
Trunks are actually the hardest thing. Seriously. You spend literal hours on the body and then the nose just... sags like a limp noodle. It is a total math problem, honestly. If your increases are even a tiny bit off, the mathematics of the whole silhouette just collapses. I was recently talking to Ritthy Allen about this—they are over on Prospect Rd in Geraldton—and we were vibing on how a Crochet Elephant Pattern is really just a high-stakes lesson in structural integrity. This focus on stitch density and silhouette is the same architectural approach I take in my Crochet Bird Pattern to ensure the piece holds its shape.
I put together this data breakdown to show you exactly where your energy goes when you are building one of these little guys.
My Take
The trunk is literally half the battle. If you nail the 'physics' of the nose, the rest of the elephant just falls into place.
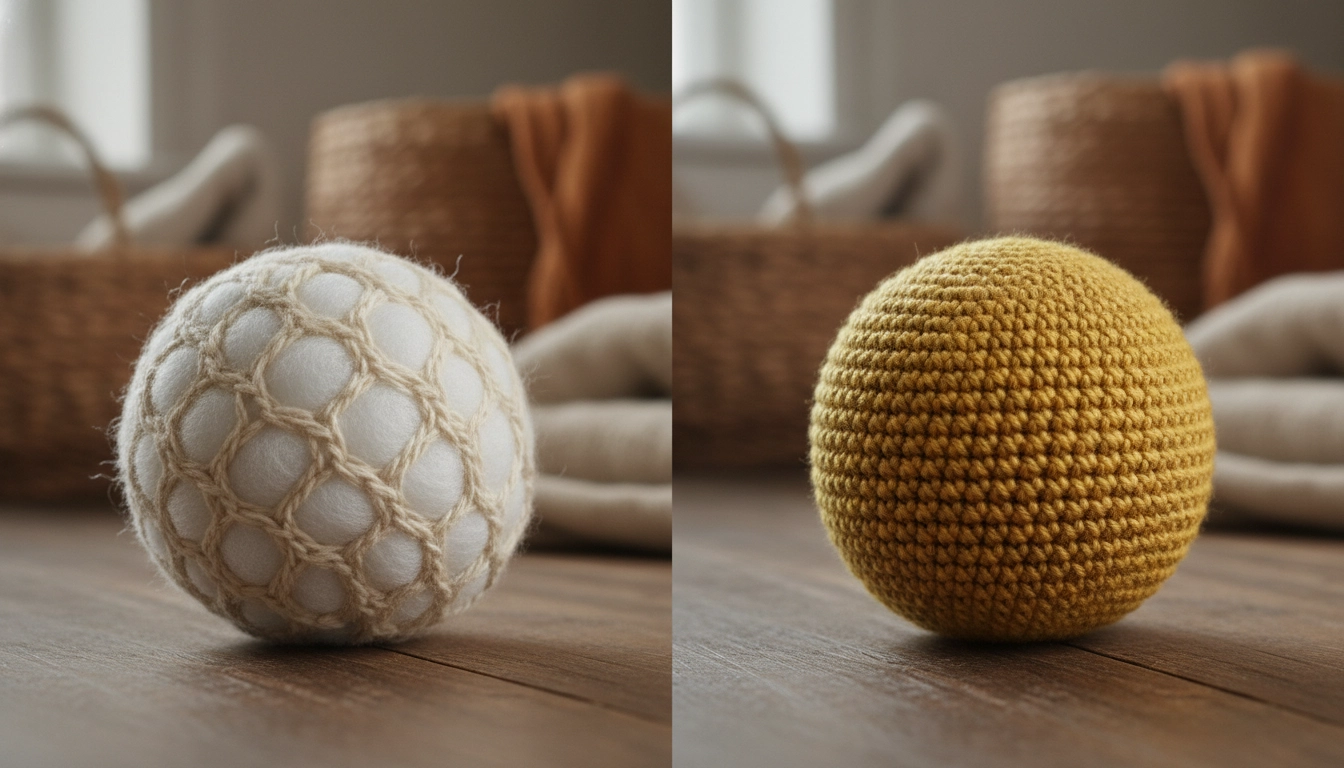
Amigurumi is more than just a hobby for your downtime. It is a slow-fashion flex. It is about building something with a soul. I hate cheap, scratchy acrylic yarn. It feels like plastic because it basically is plastic. Give me natural wool or organic cotton any day. That is how you get that heavy, expensive aesthetic that makes a toy feel like a piece of art instead of something you'd find in a bargain bin.
Understanding the Basics of Amigurumi Architecture
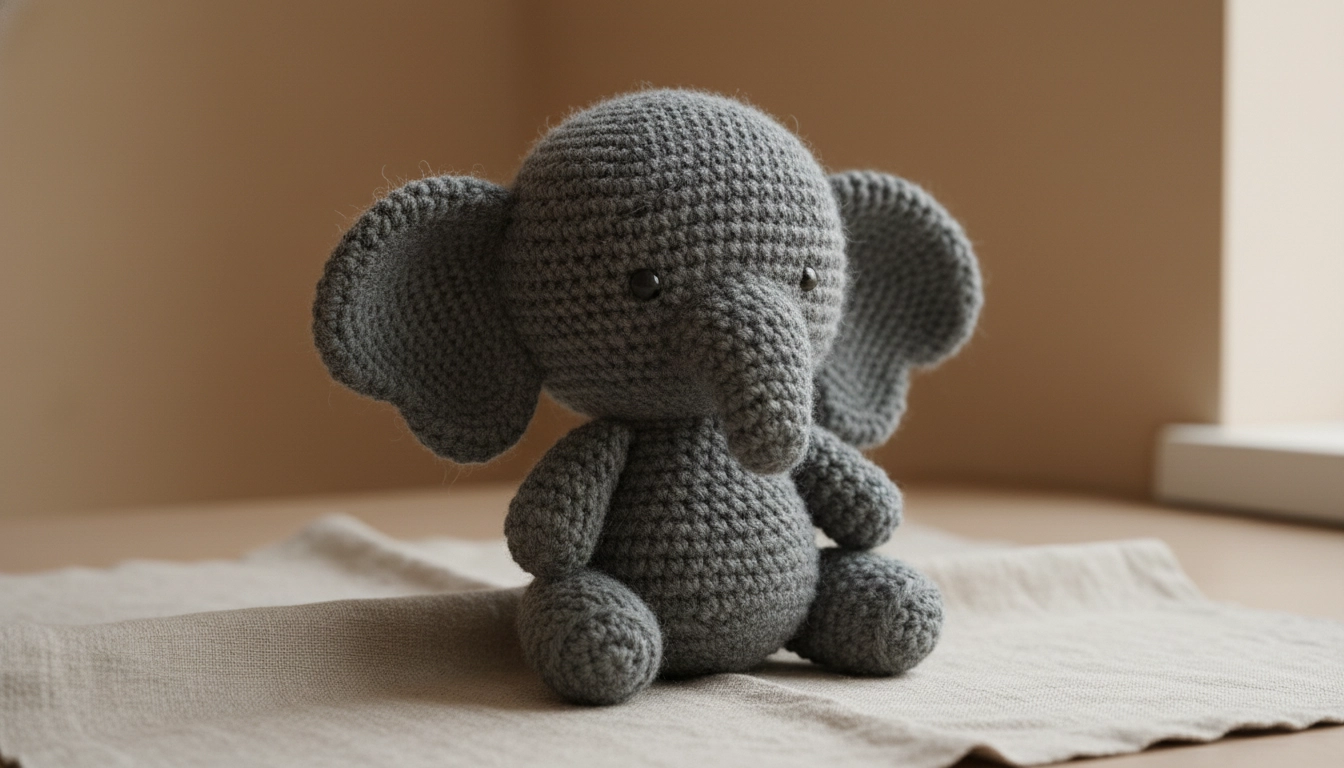
High stitch density is the foundation of a sturdy amigurumi elephant.
Amigurumi is not just a toy but a mathematical sculpture, a concept I explore in my Crochet Dog Pattern to help prevent lumpy or misshapen results. Amigurumi is basically 3D engineering with a hook. You are taking a flat string and turning it into a sculptural object. When you work on this Crochet Elephant Pattern, you are an architect. You are using sc stitches to build a fabric wall. It has to be dense. Like, really dense. If it is too loose, the stuffing starts poking through like a bad horror movie.
I created this quick comparison to help you choose the right structural foundation for your project.
| Fiber Choice | Stretch Factor | Sculpture Quality | Sustainability |
|---|---|---|---|
| Cheap Acrylic | High | Low | Zero |
| Mercerized Cotton | None | High | High |
| Merino Wool | Medium | Mid | High |
My Take
Cotton is the 'main character' of amigurumi. It gives you those crisp stitches that make people ask 'Wait, did you actually make that?'
This project is labeled intermediate for a reason. You need tension control that is actually consistent. No one wants a lumpy elephant. The geometric simplicity here is the secret. We are using spheres, sure, but we are hacking the stitch counts to get that sloping forehead. It is about visual weight.
I prefer natural cotton fibers because they have zero stretch. This is crucial. If your yarn stretches, your elephant will eventually look like a deflated balloon. We want that weighted feel. Something substantial.
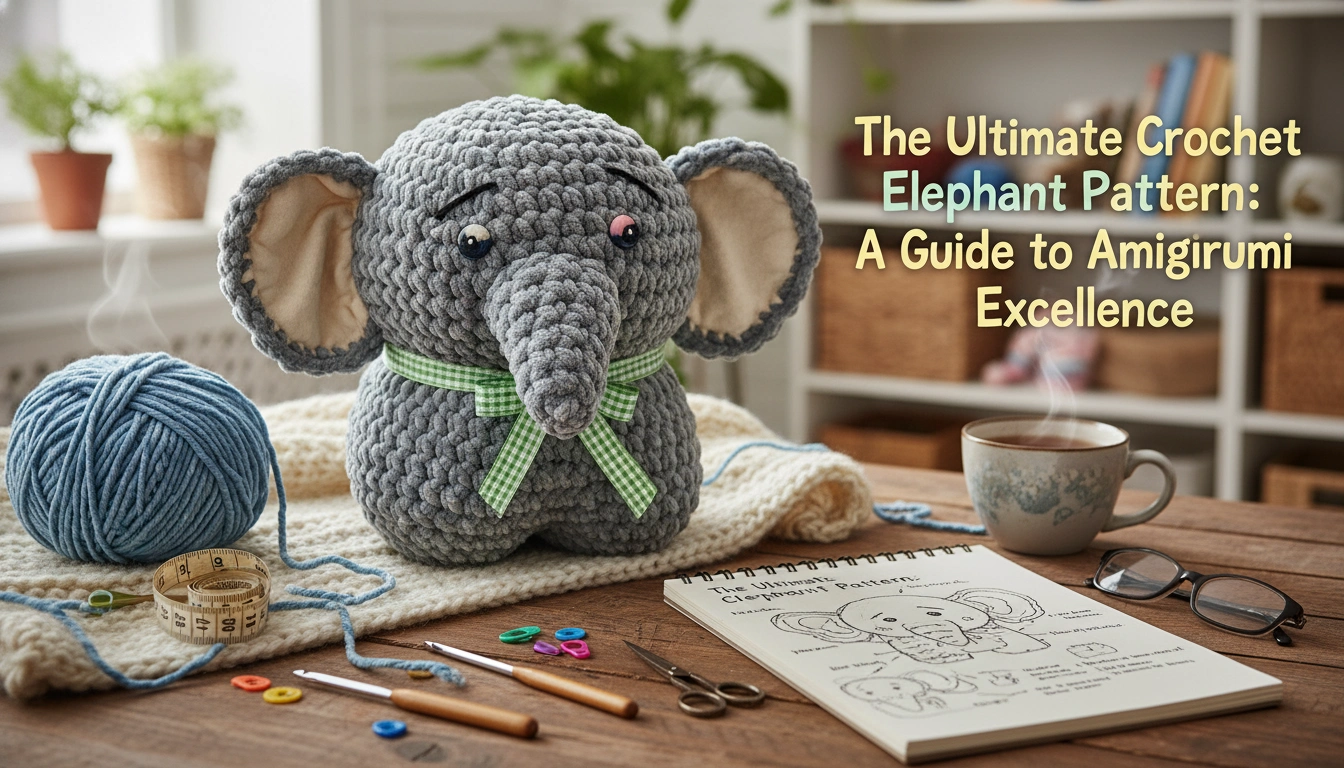
Why This Crochet Elephant Pattern Stands Out
The secret to a cute silhouette lies in the mathematical ratio of the ears to the head.
Most people are stuck in the fast-fashion loop. Buy it, break it, toss it. This pattern is a total rejection of that noise. We are part of the slow-fashion movement now. Every single stitch you make is intentional. You are creating something that should, theoretically, last for decades.
Using organic cotton or merino wool changes the whole game. It is biodegradable. It does not leak microplastics into the ocean every time you think about it. Plus, the tactile experience is just... better. It feels real.
The Math of Cuteness
The aesthetic appeal of an elephant often comes from the ratio of the ears to the head. In this pattern, the ears are oversized to create a 'chibi' or 'kawaii' look that balances the heavy trunk.
Materials and Tools Needed
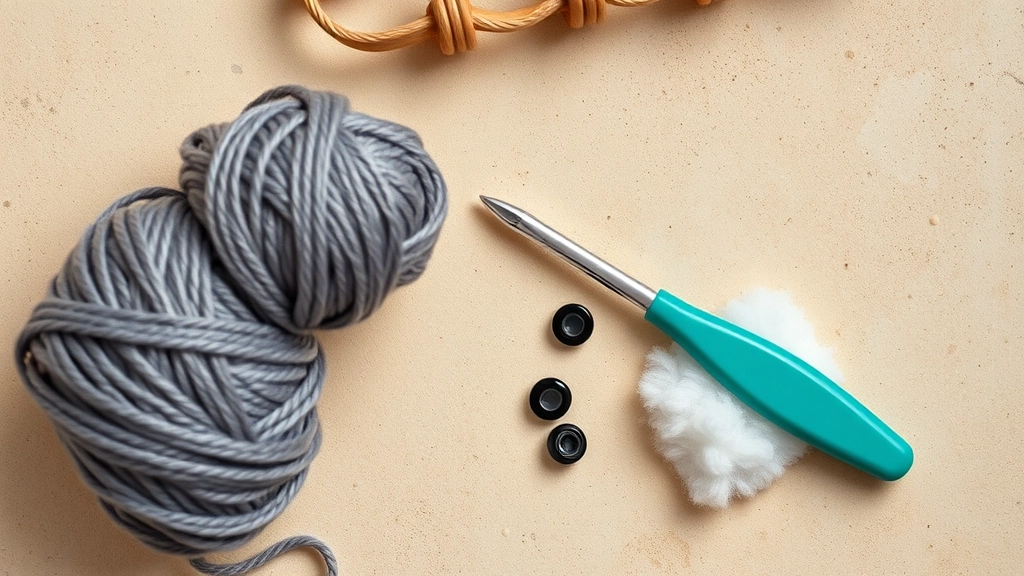
Investing in quality creative hardware like ergonomic hooks makes the process much more enjoyable.
If you want a high-end aesthetic, you cannot use trash tools. Get a 3.5mm ergonomic crochet hook. Using the correct hook to manage fiber physics is a technique I master in my Amigurumi Fish Pattern for creating high-end sculptural pieces. Your wrists will thank you later. Pair it with worsted weight cotton yarn. Cotton is the goat for amigurumi because it holds the sculptural shape perfectly.
Here is your manifesto of supplies to make sure you have everything ready before you start the grind.
| Item | Purpose | Mary's Recommendation |
|---|---|---|
| 3.5mm Hook | Stitch Density | Ergonomic handle only |
| Cotton Yarn | Body and Ears | Worsted weight organic |
| Safety Eyes | Character | 10mm glossy black |
| Poly-fill | Interior Structure | High-loft for firmness |
My Take
Don't cheap out on the hook. Carpal tunnel is not the vibe. Invest in your 'creative hardware' and your hands will thank you.
You need 100 grams of Organic Cotton Yarn for the main vibe. Then grab 20 grams of a Contrasting Color for the ears. Don't forget the 10mm safety eyes in black. And a tapestry needle for the sewing part, which is everyone's least favorite bit but it has to be done.
Get some high-loft polyester or wool roving for the insides. And a stitch marker. If you lose your place in a round, it is over. Game over. Start again. So just use the marker.
Crochet Abbreviations and Pattern Notes
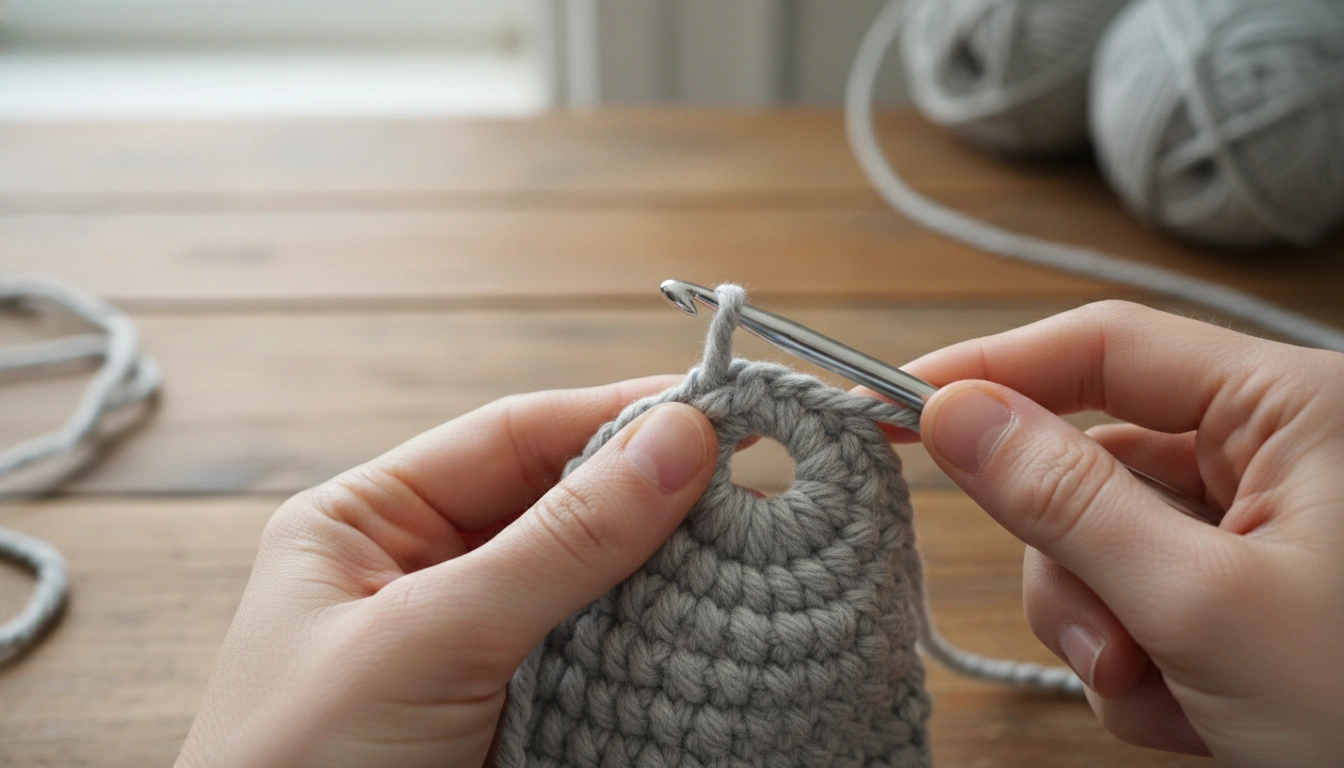
The Magic Ring (MR) is the essential starting point for seamless, round amigurumi shapes.
Let's talk mathematics. We are working in continuous rounds. Do not join the circles. It creates a weird seam and we hate seams.
I have broken down the technical dialect of this pattern so you do not get lost in the sauce.
| Abbreviation | Technical Meaning | Pro-Level Action |
|---|---|---|
| MR | Magic Ring | Pull it tight as a drum |
| sc | Single Crochet | Maintain even tension |
| inc | Increase | Two stitches, one hole |
| dec | Invisible Decrease | Front loops only, always |
My Take
The 'invisible decrease' is the ultimate hack. It makes your shaping look like it was 3D printed instead of hand-stitched.
MR is the Magic Ring. sc is single crochet. inc means two stitches in one spot. dec is an invisible decrease. Use the front loops only for the dec. It is a cheat code for making the joins disappear.
Tension Warning
If you see gaps between your stitches where the stuffing is visible, your hook is too large. Downsize by 0.5mm immediately to maintain 'structural integrity'.
How to Assemble Your Crochet Elephant Pieces
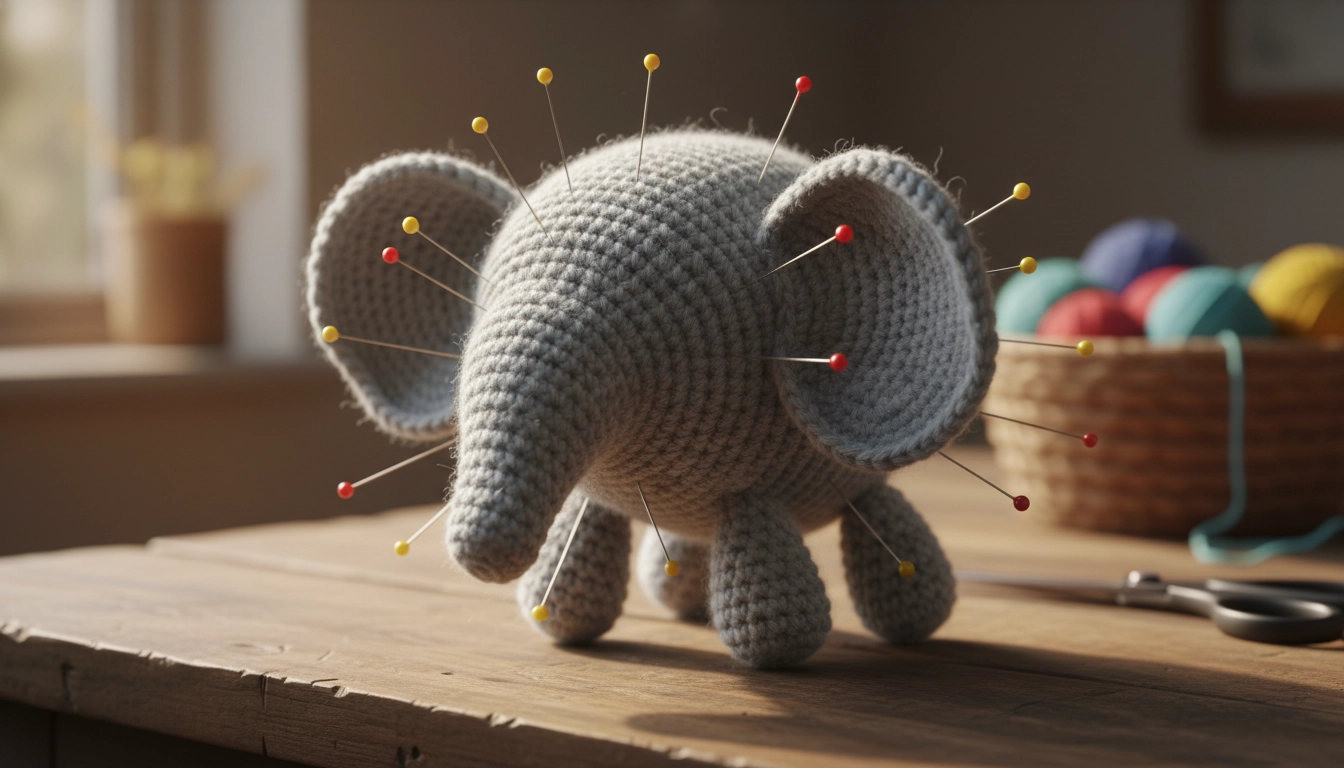
Use pins to find the perfect placement for the ears and legs before you start the final "whip stitch.
This is the make-or-break phase. Assembly is where the magic (or the disaster) happens. Stuff the head hard. Like, rock hard. If the neck area is soft, your elephant's head will just wobble around. Not cute. Use pins to find the spot for the ears. Between rounds 14 and 18 usually works.
For the legs, sit the body on a table. Pin the legs so the elephant can stand independently. This is the gravity test. If he falls over, move the front legs. It is just basic physics. Use a whip stitch to sew the head on. Go through both layers. Secure it like your life depends on it.
Expert Tips for Achieving Perfect Amigurumi Tension
Consistent gauge ensures your elephant doesn't end up looking like a "deflated balloon.
I dive deeper into how tension acts as mechanical energy in fiber within my Crochet Owl Pattern, which is essential for creating professional textile art. Consistent gauge is your best friend. If your hands are cramping, you are pulling the yarn like a crazy person. Relax. Let the hook do the work. The yarn should glide, not put up a fight.
The Invisible Decrease
To make your decreases disappear, insert your hook into the front loops only of the next two stitches. This prevents the bulky bumps that standard decreases create.
Creative Ways to Personalize Your Finished Elephant
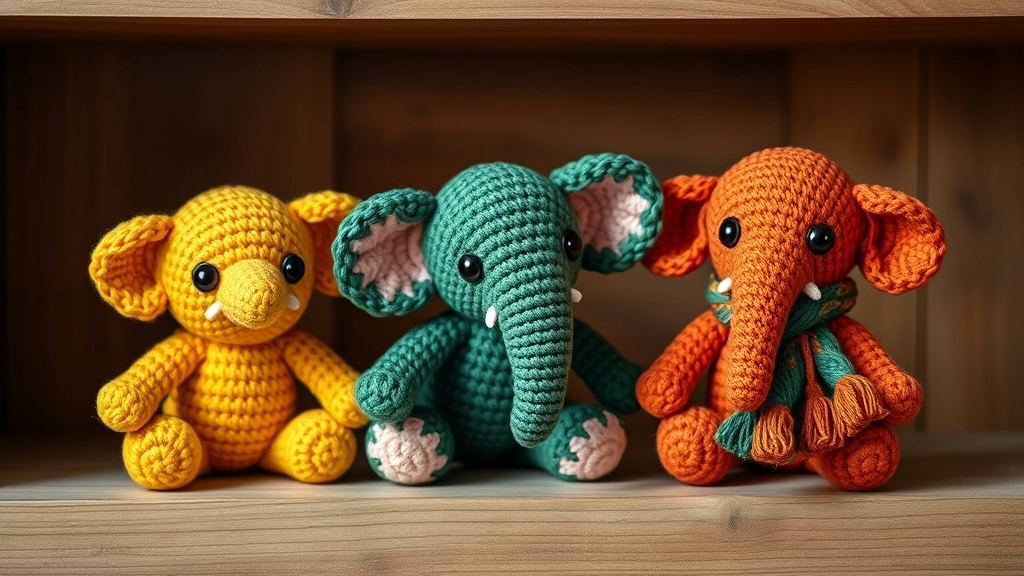
Whether you choose monochrome or rainbow chaos, personalization is where your elephant gets its soul.
Personalization is why we do this. I love color blocking. Make every leg a different neon shade. Or go chunky and use massive yarn for a giant floor cushion elephant.
Since we are all about sustainable fashion, use your scrap yarn for accessories. A tiny scarf or a little hat. It looks curated and it uses up waste. Win-win.
Conclusion
Making a Crochet Elephant Pattern is a wild ride into three-dimensional design. You have leveled up. You are not just making a toy; you are making modern slow-fashion.
Every imperfection you hit is just data. It makes the next one better. Seriously, don't sweat the small stuff. I want to see how you style these. Did you go monochrome? Or full rainbow chaos? Keep innovating. Yarn is way more powerful than people think.