
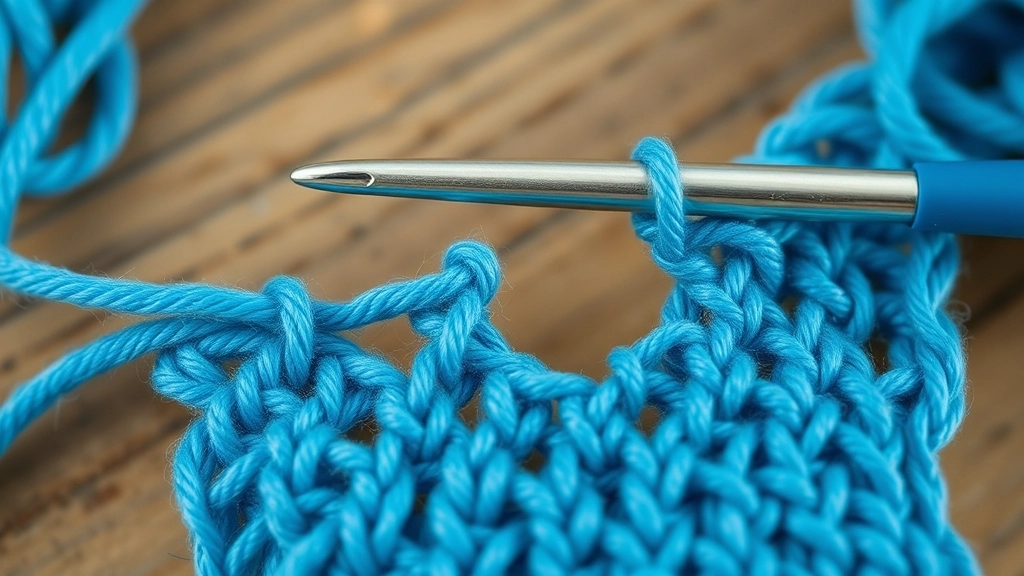
Look at the hook in your hand. Really look at it. If you are gripping a 3.5mm while trying to wrangle DK weight cotton into a fish snout, you are not just making a mistake—you are fighting the physics of the fiber. I was talking to Jessie Walters the other day about this exact thing. Most people think amigurumi is just about being cute. It isn't. It is engineering. We are taking a flat, one-dimensional string and forcing it to become a three-dimensional anatomical specimen. It requires a certain level of obsession with the math of a stitch. You have to understand how the mercerized cotton pulls against the steel. It is about the tension. Always the tension. The way the thread moves. It is like a quiet conversation between your hands and the material.
Quick Access
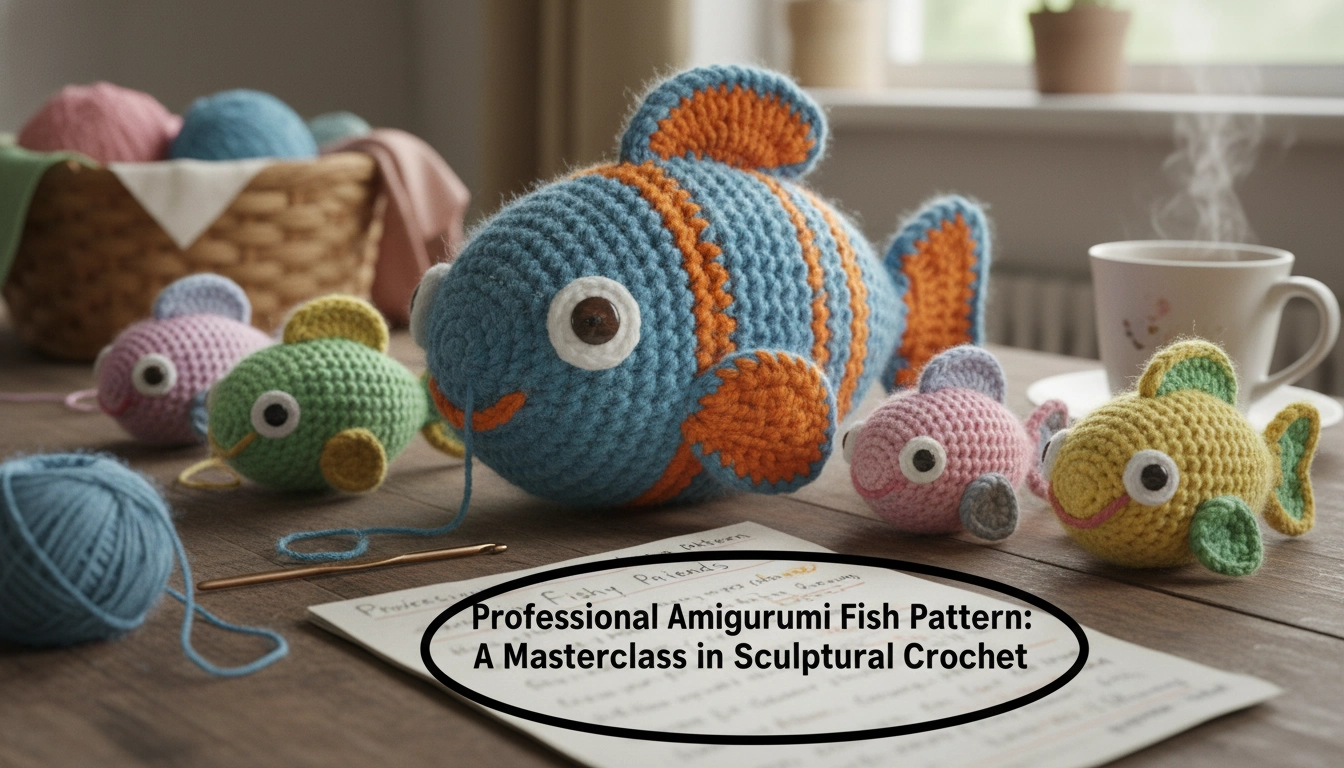
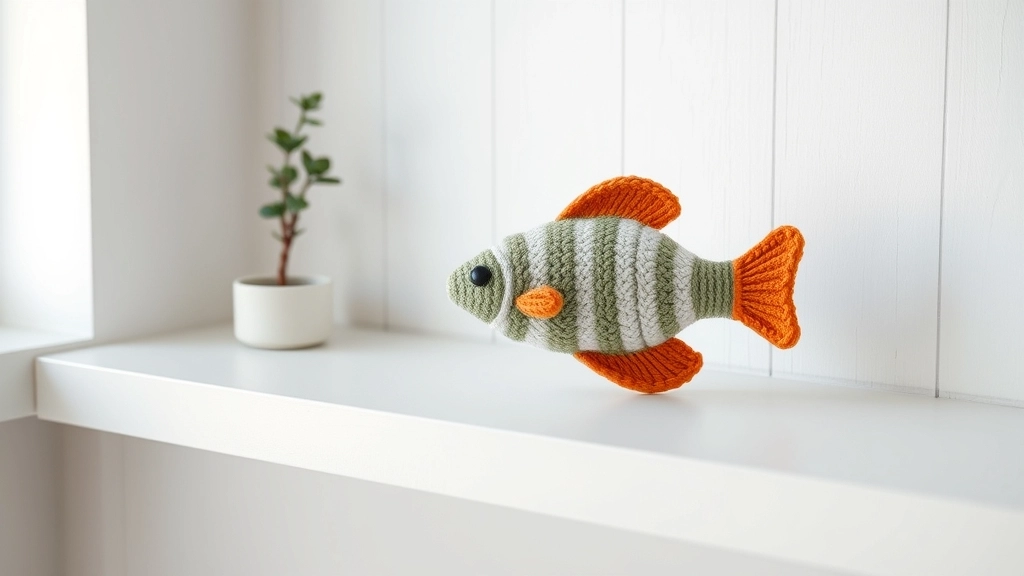
This guide provides a comprehensive 'Amigurumi Fish Pattern' including material lists, technical tips, and step-by-step instructions for creating a professional-grade aquatic plush.
This project is a deep lesson in shaping. We are manipulating the single crochet stitch to build a silhouette that actually looks like it could swim. It doesn't matter if you have been doing this for twenty years or twenty minutes. You need to respect the anatomy. I use AI-generated models to map out the curve of the caudal fin before I even pick up my yarn. It helps visualize the stitch density needed to keep the form rigid. This focus on silhouette and structural integrity is the same method used to master the Crochet Bird Pattern. By the time you finish this, you won't just have a toy. You will have a piece of fiber art that proves crochet can be sophisticated. Precise. Even a bit intimidating to those who don't understand the work.
Why You Will Love This Easy Amigurumi Fish Pattern
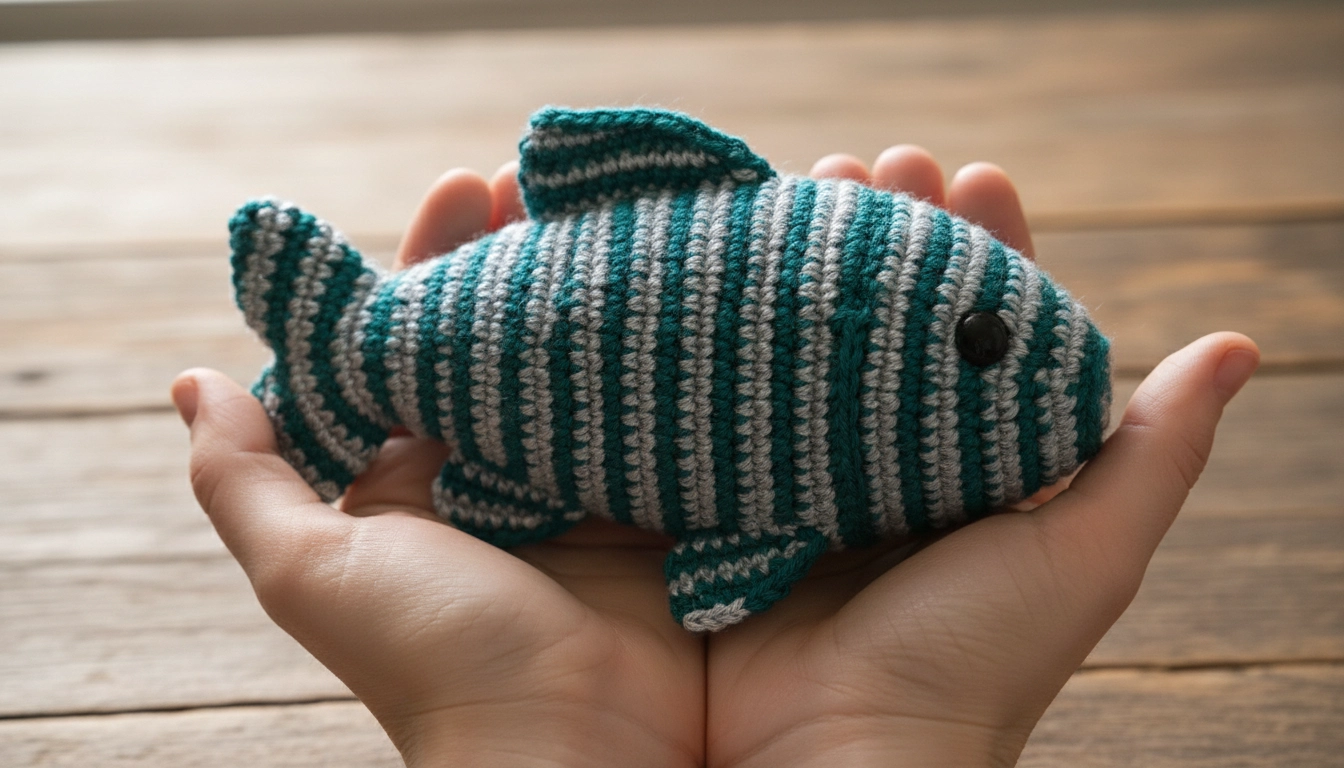
When the tension is right, the fish feels more like a sculpture than a toy.
The math here is clean. I have spent hours figuring out the exact point where a sphere should taper into a tail. It is not about following a recipe; it is about understanding the flow of the yarn. You will love this because it isn't some floppy, sad-looking thing. It is professional. It is sharp. It is something that looks like it belongs in a high-end boutique in Orange, maybe right there on E Center St where they appreciate real sculptural work. We are moving away from the homemade look. We want hand-crafted in the most expensive sense of the word.
When I talk about the difference between a hobbyist project and a professional piece, I am looking at these specific metrics. Readers can further practice these sculptural techniques by exploring the amigurumi architecture found in a Crochet Dog Pattern.
| Metric | Hobbyist Level | Professional Architect Level |
|---|---|---|
| Stitch Tension | Loose and inconsistent | High-tension and uniform |
| Material Choice | Economy acrylic | Mercerized cotton or linen |
| Shaping | Generic and rounded | Anatomically intentional |
| Finishing | Visible knots and seams | Invisible joins and hidden tails |
My Take
The transition from 'homemade' to 'hand-crafted' is entirely about the discipline of your tension and the refusal to settle for 'good enough'.
No seams. That is the secret. We use continuous rounds to make sure there are no ugly lines breaking the visual flow. It makes the color transitions look like they grew there naturally. It is about structural integrity. If a piece cannot stand up to a little pressure, it is not finished.
The Physics of Fiber
Using a hook one size smaller than the yarn label recommends ensures that your stuffing remains invisible and the structural architecture of the fish stays crisp.
Understanding the Basics of Aquatic Amigurumi
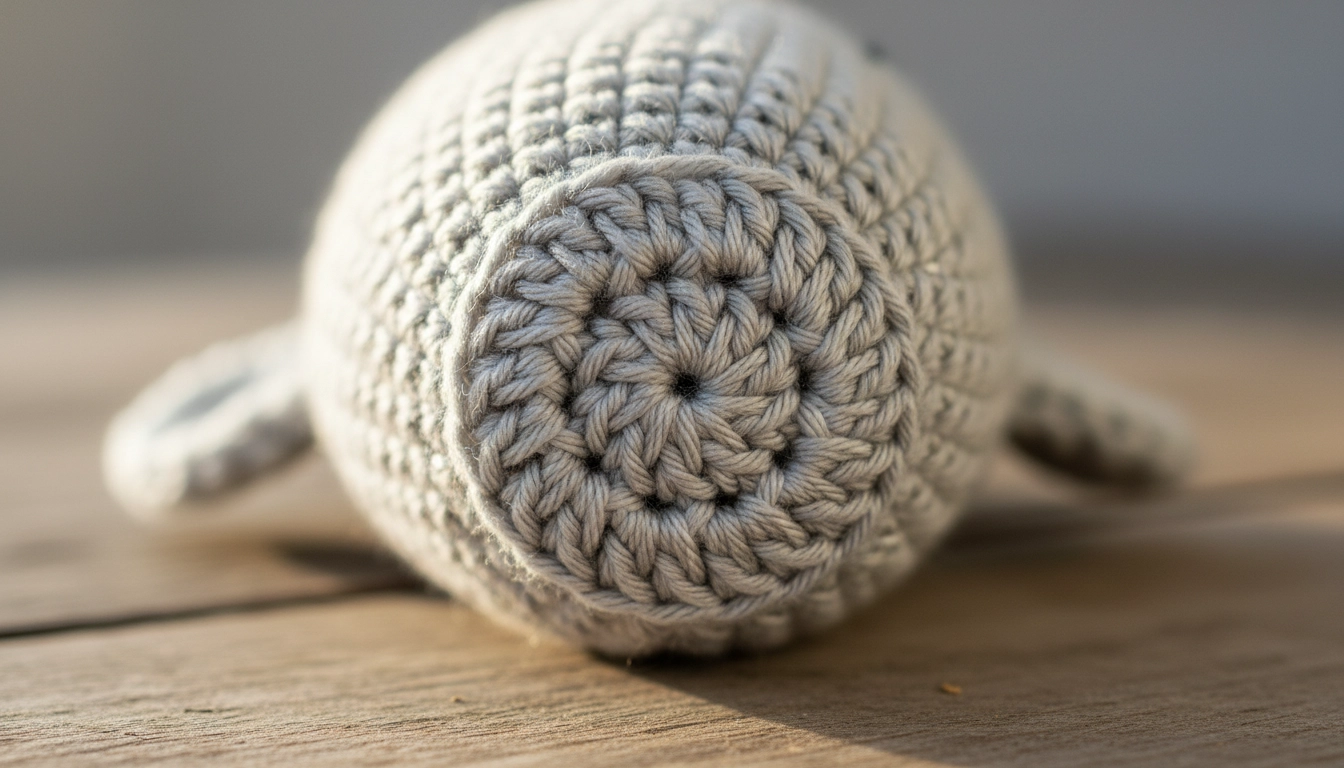
Geometry meets art: the cranial bulb must be a perfect sphere to ensure structural integrity.
Let us talk about the skeletal structure of your work. Most people lose their way when they get to the fins. The stitch definition just... vanishes. I was looking at some marine biology sketches with Jessie Walters, and the transition from the body to the tail is basically a geometric puzzle. Amigurumi is a Japanese technique, sure, but we are treating it like industrial design. You need a join that doesn't show. You want the surface to look like a single, solid skin.
I have broken down the project phases so you can visualize the build before you even pick up the hook.
| Phase | Component | Focus Area |
|---|---|---|
| Phase One | The Cranial Bulb | Maintaining a perfect sphere with no gaps. Understanding the physics and math of a perfect sphere is a skill that also applies to achieving the correct head shape for a Crochet Lion Pattern. |
| Phase Two | The Torso Taper | Gradual decreases to maintain a smooth silhouette |
| Phase Three | The Caudal Peduncle | Tightening the stitch density for the tail transition |
| Phase Four | Fin Architecture | Sculpting flat surfaces from round origins |
My Take
Think of your crochet hook as a 3D printing nozzle; you are laying down layers of material to create volume, so consistency is your only god.
Think of your yarn as rebar. Your gauge is everything. If it is too loose, the whole thing looks like a cheap pillow. We want a museum-quality model. That means packing the polyester fiberfill in so tight that the fish feels solid. If the stuffing peeks through, you have failed the first rule of professional work. Tighten up.
Materials and Tools Needed
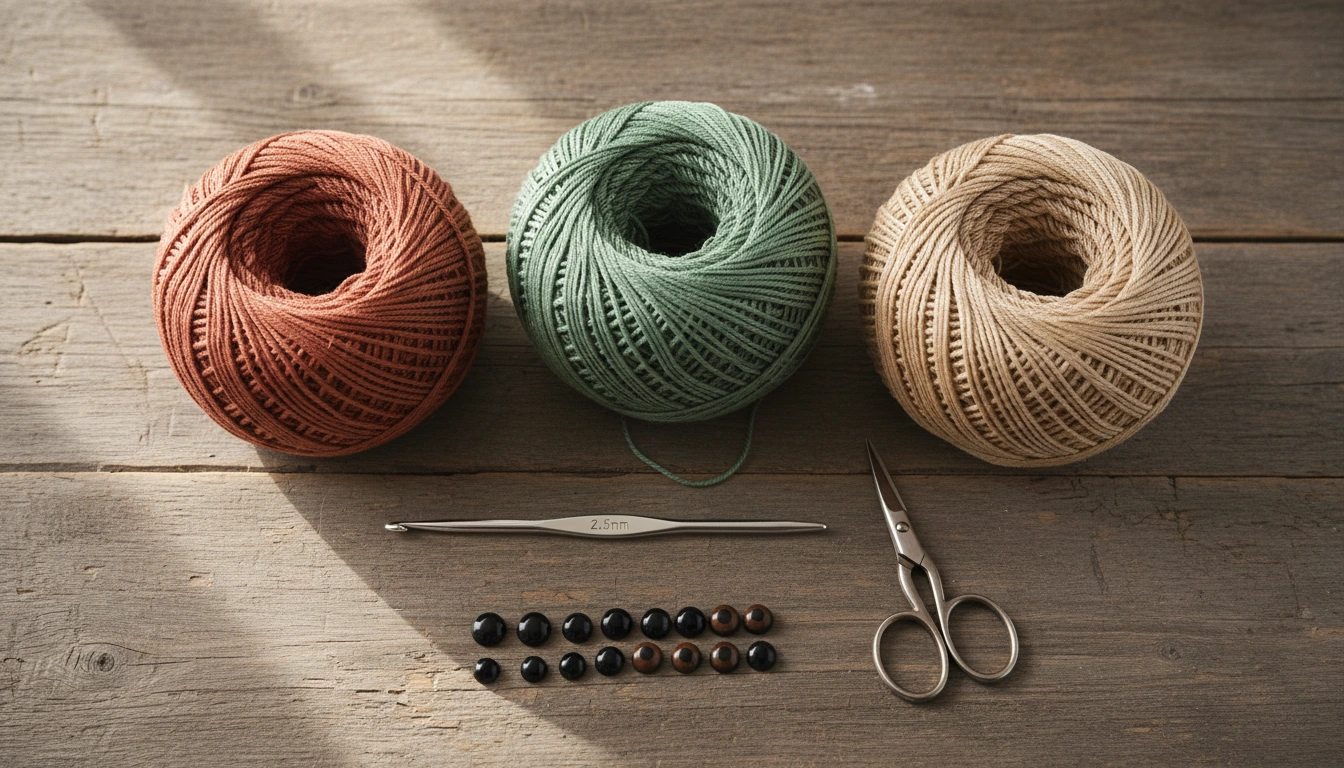
Your tools are your instruments; choose professional-grade materials for a professional-grade result.
To do this right, you need the good stuff. Mercerized cotton. Don't even look at the acrylic bins. Acrylic has that halo—that fuzzy stuff—that blurs your stitches. We want edges so sharp they could cut. You need a 2.5mm hook, some markers, and safety eyes. Using small steel hooks to bite into heavy cotton is a technique also perfected in the Crochet Red Panda Pattern to ensure the piece holds its shape.
I have mapped out how different fibers hold up under the stress of sculptural shaping.

Data visualization showing Stitch Definition Rating by Fiber.
My Take
If you use acrylic for this pattern, you are essentially drawing a blueprint with a crayon. Use cotton for the precision your work deserves.
Essential Crochet Abbreviations and Stitches
The invisible decrease is the secret to a seamless, professional finish that hides the stuffing.
The language of the hook is a code. Magic Ring (MR). It is the only way to start. If you are still doing the chain two start, stop it. It leaves a hole. We are also doing single crochets (sc), increases (inc), and the invisible decrease (dec).
Before you start, you need to speak the language of the architect; these are the fundamental units of our build.
| Abbreviation | Full Name | Technical Purpose |
|---|---|---|
| MR | Magic Ring | Creates a zero-diameter starting point |
| Sc | Single Crochet | The building block of dense amigurumi fabric |
| Inc | Increase | Two stitches in one to expand the form |
| Dec | Invisible Decrease | Reducing stitches by using front loops only to hide the seam |
| Sl St | Slip Stitch | Used for joining or finishing edges with minimal height |
My Take
Mastering the invisible decrease is the single most important skill for a clean finish; a standard decrease is a structural flaw in professional work.
The invisible decrease is where the magic happens. A regular decrease leaves a bump. An invisible one uses only the front loops. It keeps the fabric looking uniform. It is a tiny detail, but it is the difference between a pro and a hobbyist.
Step-by-Step Amigurumi Fish Pattern Instructions
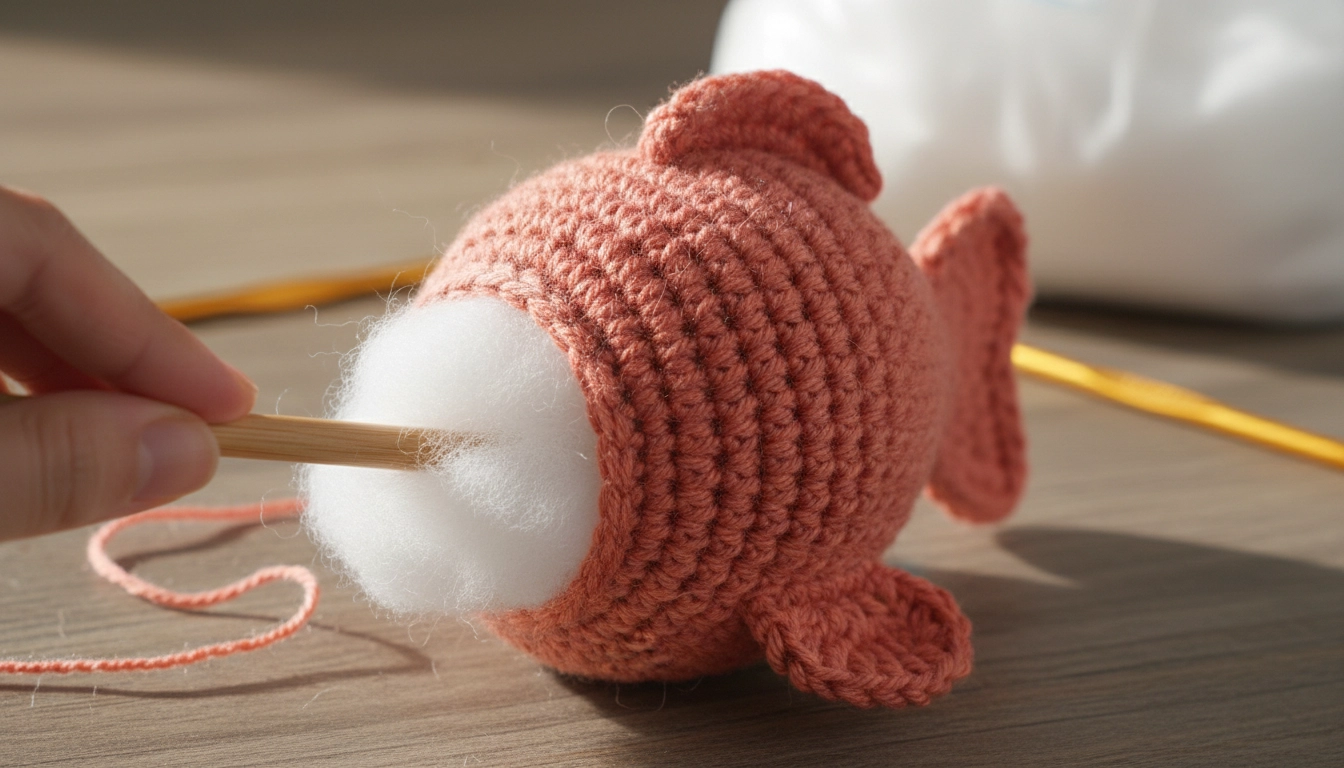
Don't be afraid to pack it in; the goal is a soft stone feel that holds its shape.
This is intermediate work. Do not rush the shaping. Pay attention to the way the rounds pull.
Symmetry Check
Always use a ruler to mark the exact center of the body before attaching side fins to avoid a lopsided swimming appearance.
Pro Tips for a Perfect Professional Finish
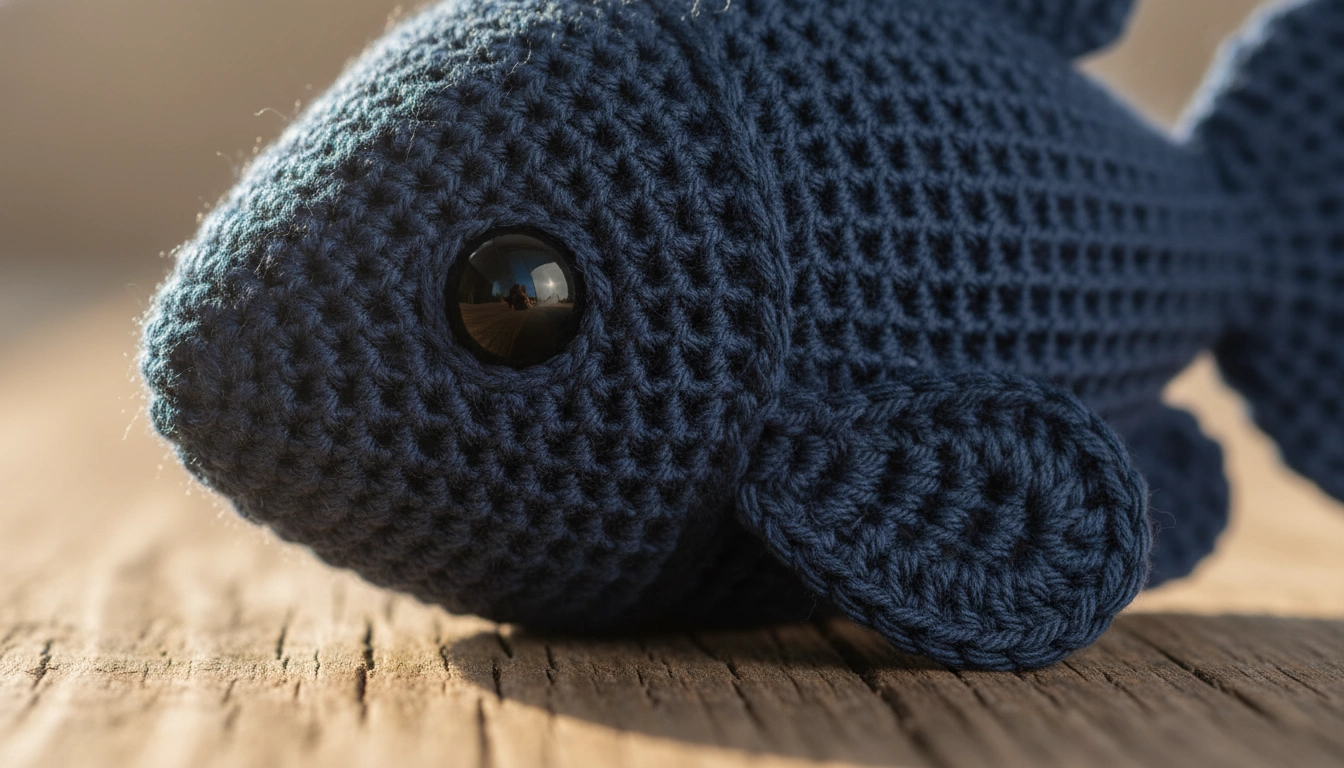
Lower eye placement gives your fish a hydrodynamic, sophisticated look rather than a cartoonish one.
You want this to look like art? Use an invisible join when you finish. Don't just pull the thread through. Use a needle to recreate the top of the stitch. It is a clean finish that hides the end of the round. Eye placement is also key. Put them too high and it looks like a cartoon. Put them lower and more forward, and suddenly you have something hydrodynamic.
If you run into trouble during the assembly, consult this troubleshooting guide to get back on track.
| Problem | Likely Cause | Solution |
|---|---|---|
| Stuffing showing through | Hook size too large | Drop down half a millimeter in hook size |
| Fish looks lopsided | Asymmetrical increases | Use a stitch marker for the start of every round |
| Fin is curling | Tension is too high | Relax your grip slightly for the final decorative row |
| Eyes look off | Placed on different rounds | Count rounds from the magic ring to ensure alignment |
My Take
Precision in assembly is what separates a toy from a masterpiece. Take the extra five minutes to measure your eye placement.
Over-stuffing is your friend, but only in the middle. You want the tail to stay a bit flatter so it looks flexible. If you see holes, your hook is too big. Go down a size. The fabric should feel like a soft stone. Firm. Unyielding. That is how you make it last.
Creative Color Combinations and Customization Ideas
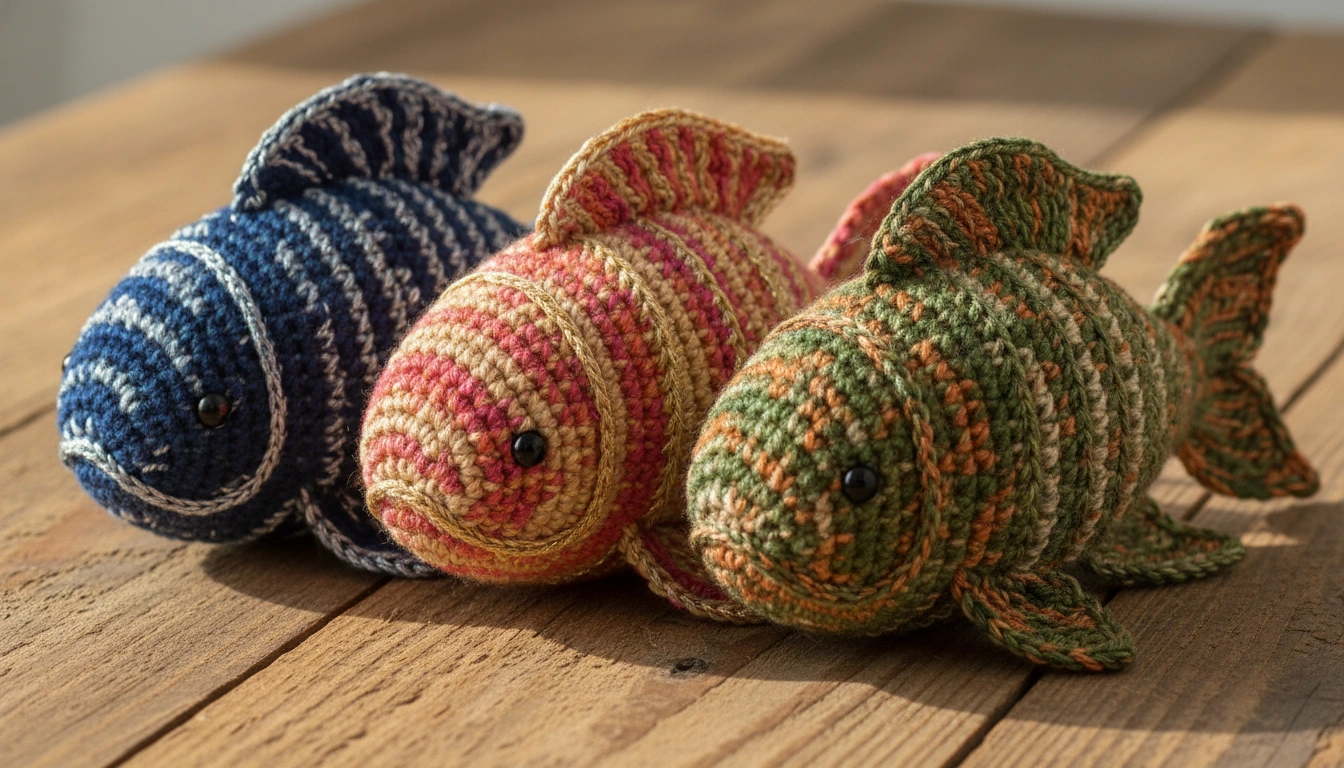
Experiment with palettes like 'Deep Sea' or 'Tropical Reef' to turn a single pattern into a diverse collection.
Color is where the mood happens. Goldfish orange is fine, but try some variegated yarns. I am talking about ones with short color changes that mimic light hitting scales. It creates a tactile rhythm across the surface. It is like a visual song. You can even use some surface crochet to add detail. Little lines. Stripes. Spots.
I have curated a few palettes that move beyond the basic primary colors to give your aquatic art a sophisticated edge.
| Theme | Primary Color | Secondary Color | Accent Color |
|---|---|---|---|
| Deep Sea | Midnight Navy | Silver Metallic | Electric Teal |
| Tropical Reef | Sunset Coral | Pale Gold | Cream |
| Freshwater | Olive Drab | Moss Green | Burnt Orange |
My Take
Don't be afraid of high-contrast palettes; in the water, visibility is a survival trait, and in art, it is a statement.
Sometimes I hold a thin strand of metallic thread along with my cotton. It gives the fins a wet, glistening look. It is these small touches that make people realize they are looking at something special.
Textural Contrast
Try using a metallic embroidery thread held together with your cotton yarn for the fins to create a glistening, watery effect.
Conclusion
You have moved from hobbyist to artist; your finished fish is now a piece of sculptural fiber art.
So, you have built a fish. It is a rewarding thing, turning a ball of string into a solid object. You have focused on the density of your stitches and the math of the shape. That is the real work. I hope you share what you have made. The community needs more people who care about the technical side of things.
Keep pushing the boundaries of what a hook can do. Try different fibers. Maybe a linen blend next time? The underwater world is huge, and this pattern is just the first step. Go explore it. Your commitment to getting the details right is what makes you an artist.