

Free Annuals Floral Granny Square Crochet Pattern
When a floral crochet block collapses into a dense, bowl-shaped cup, it is almost never your yarn throwing a tantrum—it is a total breakdown in stitch height geometry. You cannot force a 3D central bloom to lie flat on a 2D plane without calculating the radial expansion. It fails the math every single time.
If you want a clean, structural motif that lays totally flat without needing three gallons of steam to stay put, this Free Annuals Floral Granny Square Crochet Pattern fixes the entire radial geometry problem using exact stitch placement. To try a continuous two-tone swirl center instead, take a look at the Free Spiral Sunburst Granny Square Crochet Pattern.
My associate Alicia Robinson came by my studio on College St last week carrying a stack of distorted floral blocks. Her petal layers were aggressively yanking the background canvas forward into a curve. So, we re-worked the anchor points behind the petals and balanced out double crochets with treble corner expansions. Boom. Crisp, modern botanical block.
This step-by-step breakdown guides you through building a high-contrast annual flower block that holds its structural shape in blankets, custom wearables, and heavy modular bags.
Understanding the Basics of the Annuals Floral Motif
Look at how this block works structurally. You have a central sunburst core, eight rounded petals, strategic leaf points, and a structural frame to lock it all down. It is not standard flat tapestry stuff where every color change sits on one boring layer. This constructs the flower head first, then builds an entire structural grid behind it.
That rear-grid setup lets those deep purple petals pop off the fabric surface while keeping the outer square tight and rectangular. Managing how stitch heights build spatial depth is everything here. For another technique on balancing 3D botanical elements on a flat grid, explore the Free Tulip Granny Square Crochet Pattern.
The central yellow core sets up your radial spokes. The purple layer pushes outward volume. Green stitches lock down the corner leaf nodes. Then cream stitches square off the whole thing into a clean, four-sided grid system.
Before we pick up the hook, let us look at how the layers stack together mechanically so you understand why each stitch height exists across the motif.
| Layer | Color | Primary Stitch Type | Structural Function |
|---|---|---|---|
| Central Core | Soft Yellow (Color A) | Double Crochet | Establishes 16 radial spokes for base symmetry |
| Petal Layer | Deep Violet (Color B) | Chain Loops & DC Petals | Generates 3D surface volume with 8 rounded petals |
| Leaf Corners | Forest Green (Color C) | Treble Crochet & DC | Converts circular blossom into a 4-corner foundation |
| Framing Grid | Off-White (Color D) | DC Clusters & HDC Borders | Locks edges into a flat, dimensionally stable 6x6 square |
Studio Secret
Stacking treble crochets specifically at the four green corner points offsets the distance gap between the center ring and the outer frame, preventing the dreaded edge bowing.
Required Materials and Supplies for Floral Granny Squares
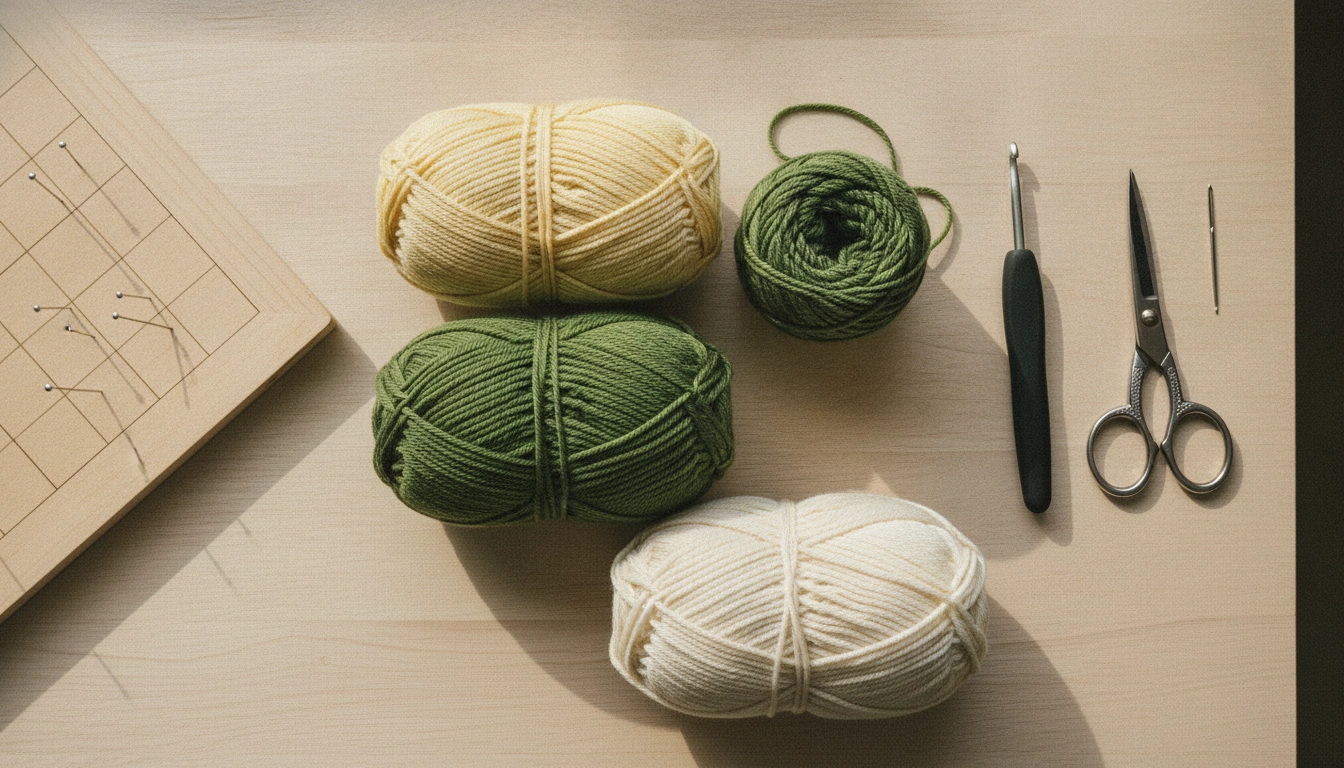
Gather your worsted weight yarn, 4.5mm hook, needle, and blocking supplies before starting.
Selecting yarn is pure physics. You need high twist and almost zero slub if you want crisp stitch definition and real structural integrity. Natural wool or crisp worsted organic cotton will hold shape infinitely better than slick, loose-ply acrylics that sag under tension.
Project Snapshot
- "Skill Level": Intermediate
- "Estimated Time": 45 to 60 minutes per square
- "Finished Size": 6 inches by 6 inches (15 cm by 15 cm) fully blocked
- "Gauge": 16 stitches and 8 rows = 4 inches (10 cm) in double crochet using a 4.5 mm hook
- "Terminology": Standard US Crochet Terms
Safety Notice for Wearables and Toys
If adapting this motif for infant garments, crib blankets, or children's accessories, ensure all yarn tails are woven in multiple directions and securely knotted. Do not attach loose decorative beads or safety eyes to granny square motifs intended for children under 36 months.
If you usually struggle with your center ring stretching out or gaping open over time, follow this step-by-step setup before jumping into Round 1.
Securing the Flower Core Magic Ring
Tension Tip
Weaving your starting tail in opposite directions across the ring base keeps the core locked tight even after heavy machine washing.
The Pattern: Crocheting the Yellow Flower Core and Purple Petals
Your base relies on a ring of sixteen double crochet stitches. Precision in this opening round is vital. Miss one stitch here and your entire four-corner grid alignment collapses three rounds later. The math does not forgive errors. If you want to practice transitioning a 360-degree circular motif into a square block, view our Free Sun Granny Square Crochet Pattern.
Studio Tension Secret
To prevent the central magic ring from loosening over time, work your starting tail over the first eight stitches, then pull it tight and secure it with a square knot using your yarn needle before moving to Round 2.
Push those purple petals forward with your thumbs when you finish Round 3. You should see eight symmetrical petals forming a bold, circular blossom around that yellow center.
Designer's Note
Notice in the diagram how Round 4 anchors behind the petals. Working into the rear spaces gives the petals room to lift without pulling the background grid out of square.
Working the Leaf Accents and Background Framing
To turn a circle into a rigid square, anchor green leaf clusters directly into the back loops of Round 1 or behind the petal bases from Round 2. That lets the front petals float freely while establishing a solid grid system behind the bloom.
Geometric Alignment
The corners of your square are established in Round 4 by expanding stitch heights. We use treble crochets at the four cardinal points to bridge the distance from the round core to the outer square edge.
Shifting from organic curves to sharp right angles is all about stitch grouping. The leaves poke out at four distinct points, framing that deep violet flower head.
Free Annuals Floral Granny Square Crochet Pattern: Squaring Off and Edging
Now we execute the real structural conversion. The cream background stitches span the gaps between the four green leaf corners, turning the outer perimeter into a straight-sided canvas.
Weave all your loose tails into the back using your steel needle after finishing Round 7. For crisp edges, pin the block out to 6x6 inches on a blocking mat and steam hit it with an iron held two inches above the fiber.
If your block is coming out slightly distorted or uneven during initial tests, use this quick diagnostic table to correct common tension and height imbalances.
| Symptom | Primary Cause | Quick Fix |
|---|---|---|
| Square cups into a bowl shape | Core stitches missing spokes or worked too tight | Recount Round 1 to ensure exactly 16 double crochets |
| Petals curl forward excessively | Hook size too small for Round 3 petals | Increase hook size by 0.5 mm for petal round |
| Edges bow outward along sides | Side stitches too tall relative to corner points | Stick strictly to half double crochets along side edges |
| Corners pull inward tightly | Corner chain gaps too short | Maintain a full ch-2 space at all four cardinal corners |
Studio Hack
Always block your individual squares before seaming. Steam blocking aligns the corner ch-2 spaces so your seaming needle passes through cleanly without twisting.
Creative Styling: Ways to Use Your Annuals Granny Squares
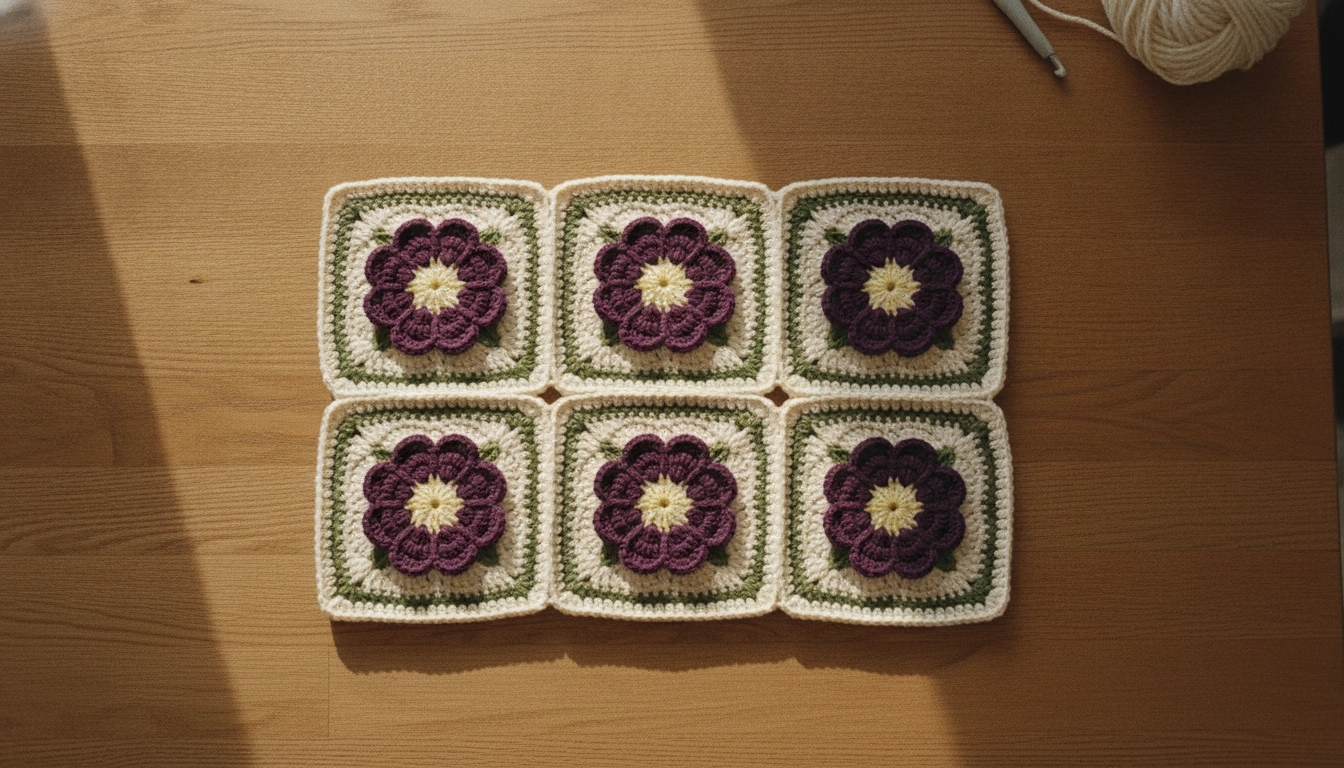
Joining multiple floral blocks together forms a stunning windowpane grid ideal for sweaters or bags.
Building modular garments out of floral motifs is the ultimate slow-fashion move. Because this motif splits clearly into distinct visual zones, changing up your color assignments completely transforms the vibe of the finished piece. If you want to mix edgy graphic blocks into your modular blankets or cardigans, check out the Free Skull Granny Square Crochet Pattern.
Here is a handy breakdown comparing project scale, square counts, and assembly methods when planning your finished builds.
| Project Type | Square Count | Recommended Assembly Technique | Blocking Requirement |
|---|---|---|---|
| Crochet Crop Cardigan | 24 to 30 Squares | Flat Slip Stitch Seam (Back Loops Only) | Pin to exact measurements before seaming |
| Structured Market Tote | 13 Squares | Invisible Mattress Stitch with Cotton Thread | Heavy wet blocking with stiffening spray |
| Heritage Throw Blanket | 48 to 64 Squares | Continuous Join-As-You-Go (JAYG) | Batch steam blocking per panel |
My Take
When making wearable garments like crop cardigans, slipping into the back loops only during joining keeps the seam lying completely flat against your body.
When assembling a sweater or bag, consider how your border color binds the design. Running Color D (Cream) through all joining seams creates a clean windowpane grid across the fabric.
Bringing Your Annuals Floral Granny Square Project to Life
Mastering 3D crochet geometry comes down to physical tension and controlling stitch height across rounds. By working through this Free Annuals Floral Granny Square Crochet Pattern, you built a structural block that balances 3D petal volume with a completely flat framing system.
Try flipping the color assignments or hooking your blocks into a fresh sweater layout. If you made this block, share your finished work with our online community and drop your stitch questions in the comments!